Morse Code Decoder - K115680BSJH
Contents:
- IK3OIL Decoder
- The IWB8RCR development of the IK3OIL CW Decoder
- Plugs Positions
- Components
- Source Code
- Setup
- References
[Top][Home]


Designed primarily for learning CW, The decoder uses a PIC16F84 microprocessor
and a NE567 PLL as analog interface.
Nominal working voltage is 9V with a working current of 33mA
The software automatically adapts to incoming CW at speeds between 5 and 30 WPM.
The circuit has been published in QST in August 1999.
[Top][Home]
IK3OIL Decoder
A PIC16F84-Based CW Decoder By Francesco Morgantini, IK3OIL:
https://www.iz3mez.it/wp-content/library/appunti/A%20PIC16F84-Based%20CW%20Decoder.pdf
[Top][Home]
The IWB8RCR development of the IK3OIL CW Decoder
An earlier prototype was developed by IK3OIL:
https://www.qsl.net/wb8rcr/cwreadr.html
[Top][Home]
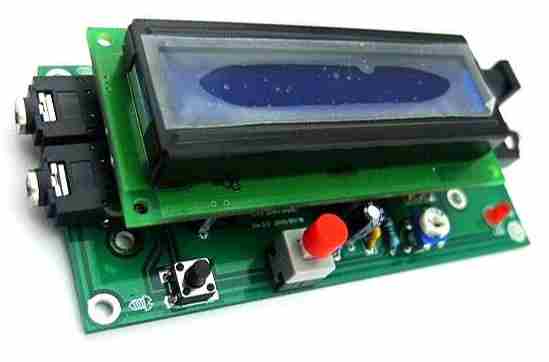
Plugs Positions

The red button down adds space between characters and up leave no spaces.
[Top][Home]
Components
Power supply: DC7-12V/500mA
CD4093BE - CMOS QUAD 2-INPUT NAND SCHMITT TRIGGERS:
https://pdf1.alldatasheet.com/datasheet-pdf/view/26895/TI/CD4093BE.html
PIC16F84A Processor:
NE567N - Tone decoder/phase-locked loop:
https://pdf1.alldatasheet.com/datasheet-pdf/view/17987/PHILIPS/NE567N.html
[Top][Home]
Source Code
Source: http://rfanat.ru/pic/Morse_Code_Decoder_Circuit.html
[Top][Home]
Setup
Set-Up for Tinkering:
- Remove the LCD by gently lifting the LCD header pins out of their sockets
- Turn the LCD adjust all the way counterclockwise and then back clockwise a few degrees.
- Replace the LCD.
- Plug in a 9-12 volt power source into the power input plug.
- Note whether the LCD is too dark or too bright and adjust accordingly with the LCD adjust.
- Find a CW Morse Code player such as “MorseCat 2.0” online and download it to your computer.
- Create a CW file and run it on the Morse Code player.
- Connect a cable between your computer’s audio output to the CW decoder audio input.
- Connect a cable between the CW decorder’s audio output and a speaker or just use a headphone set.
- While the CW player is running, you should hear it playing, but may not see anything on the
screen but a string of “I’s” and “E’s”–believe it or not, this is a good sign.
- Turn the tone frequency adjust all the way clockwise.
- Set your CW player tone to 690 Hertz on your computer.
- Set your CW player speed to 22 words per minute.
- Set your computer volume to 50%
- Push the reset button on the CW decoder.
- At this point you should now see the CW decoder operating as it should, reading
off the CW file you are playing on the CW player on your computer.
- Tap the red character spacing button to select either “no spaces” or “single
spacing”–single spacing works best for reading.
- At this point you can vary the CW player tone frequency, the CW player speed
and the computer volume to get the best audio signal to your CW decoder.
[Top][Home]
References
https://www.qsl.net/wb8rcr/cwreadr.html
[Top][Home]
Glenn Lyons VK4PK
glenn@LyonsComputer.com.au
Ver:gnl20210218 - pre published v0.9