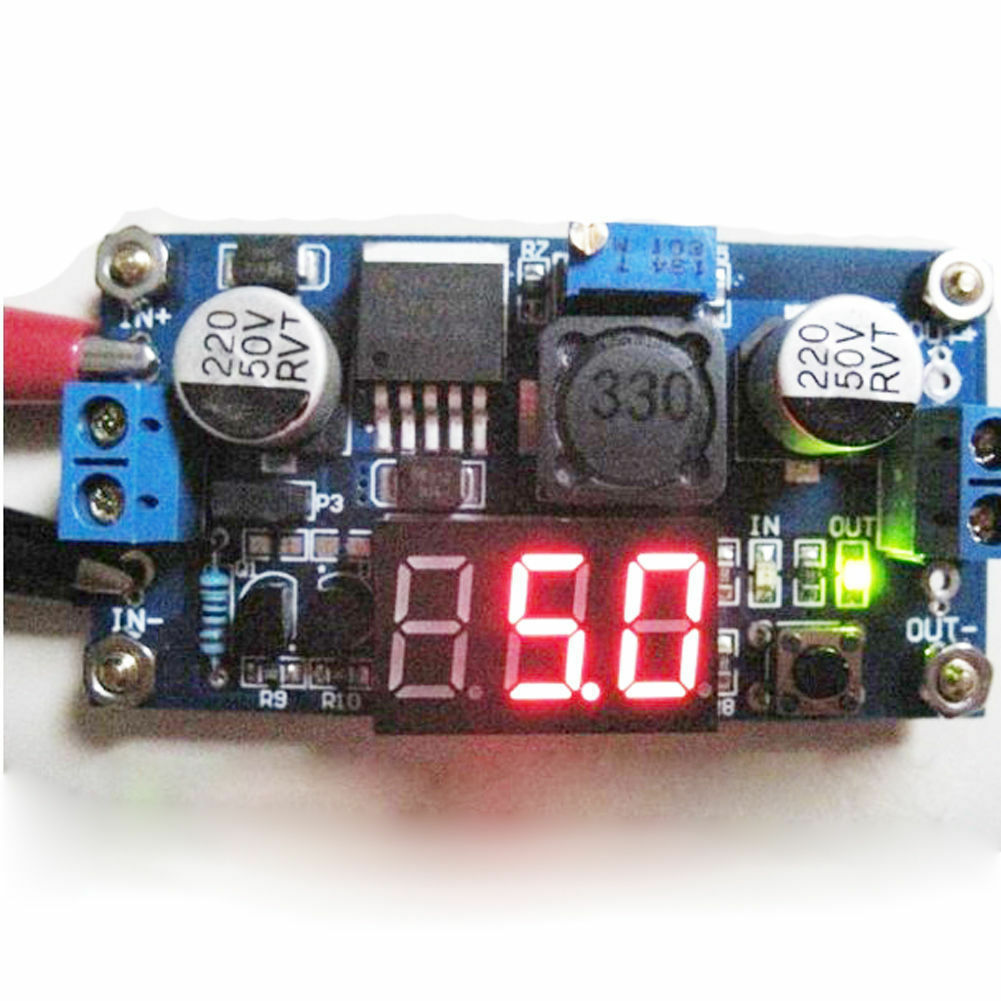
LM2596S-DS2596 1.5V 30V Buck Stepdown
Specifiction:
- LM2596 IC Buck Mode
- Input voltage range:4~40VDC
- Output voltage range:1.25-37VDC adjustable
- Output current:2A
- Voltmeter range: 0 to 40V, error ±0.1V
- Input reverse polarity protection
- Built in output short protection function
- Built in thermal shutdown function
- LxWxH 6.1*3.4*12 cmSpecification:
- Input voltage range:4-40VDC
- Output voltage range:1.25-37DC adjustable
- Output current:2A Voltmeter range:0 to 40V,error +-0.1V
- Input reverse polarity protection
- Short protection function
- Thermal shut down function
- L x W x H=6.1 x 3.4 x12cm(approx.)
- LED digital voltmeter tube,the accuracy is adjustable function,can be aimed
at your multimeter adjustable accurate
- Press the right key to let the dispaly show the input or output voltage.when
the right "OUT" led is light, it shows output, the left "in" led show input
Output voltage calibration steps:
- Step 1, adjust the right button so that "OUT" LED lighted, the voltmeter shows the
value of output voltage; Press the right button for more than 2 seconds, release,
voltmeter and "OUT" LED flashes in synchronization so that you enter the output
voltage calibration mode.
- Step 2, press the right button (normal speed), the voltage value is adding up a unit;
Press the left button, minus a unit; Due to a unit is less than 0.1V, the minimum
voltage display to 0.1V, so you need to continuously press 1-5 times to see the
voltmeter change 0.1V, how many times voltmeter change 0.1V by pressing the key,
depending on the current display voltage, the higher the voltage, the fewer the
number of press.
- Step 3, press the right button for more than 2 seconds, release, to exit the output
voltage calibration mode. All parameters set to automatically power down to save.
Input voltage calibration steps
- Step 1, adjust the right button so that "IN" LED lighted, the voltmeter shows
the value of input voltage; press the right button for more than 2 seconds,
release, voltmeter and "IN" LED flashes in synchronization so that you enter
the input voltage calibration mode.
- Steps 2 and 3, consistent with the output voltage calibration method.
Note:
If the module can not be adjusted, that is, the output voltage is always equal to the
input voltage rotate counterclockwise the potentiometer 10 turns or more, then try to
adjust the output voltage. The factory default output voltage is 20V.
[Top][Home]
- Weight: 22g
- LED digital voltmeter
- Adjustable voltages accuracy
Programming Instruction:
To Calibration Output Voltage:
- Adjust the right button so that "OUT" LED lighted, the voltmeter shows the
value of output voltage; Press the right button for more than 2 seconds,
release, voltmeter and "OUT" LED flashes in synchronisation so that you
enter the output voltage calibration mode.
- Press the right button (short press), the voltage value increases one unit
unit; Press the left button, the voltage decreases one unit; As a unit is
less than 0.1V, the minimum voltage display to 0.1V, so you need to
continuously press 1-5 times to see the voltmeter change 0.1V, how many
times voltmeter change 0.1V by pressing the key, depending on the current
display voltage, the higher the voltage, the fewer the number of press.
- Press the right button for more than 2 seconds, release, to exit the output
voltage calibration mode. All parameters set to automatically power down to save.
Output voltage calibration steps:
- Step 1, adjust the right button so that "OUT" LED lighted, the voltmeter shows the
value of output voltage; Press the right button for more than 2 seconds, release,
voltmeter and "OUT" LED flashes in synchronization so that you enter the output
voltage calibration mode.
- Step 2, press the right button (normal speed), the voltage value is adding up a unit;
Press the left button, minus a unit; Due to a unit is less than 0.1V, the minimum
voltage display to 0.1V, so you need to continuously press 1-5 times to see the
voltmeter change 0.1V, how many times voltmeter change 0.1V by pressing the key,
depending on the current display voltage, the higher the voltage, the fewer the
number of press.
- Step 3, press the right button for more than 2 seconds, release, to exit the output
voltage calibration mode. All parameters set to automatically power down to save.
Notes:
1. Recommended to confirm voltages with a multimeter.
2. If The module can not be adjusted, and the output voltage is always
equal to the input voltage, then counterclockwise
rotation of the potentiometer 10 laps or more, then attempt to adjust the output voltage.
This can be caused if the factory default output voltage is 20V.
[Top][Home]
Glenn Lyons VK4PK
glenn@LyonsComputer.com.au
Ver:gnl20182018 - pre published v0.9