The SvxLink Server AUDIO_CHANNEL
Specify the audio channel to use. SvxLink can use the left/right stereo channels as two mono channels. Legal values are 0 or 1is a general purpose voice services system, developed by
Tobias Blomberg, by SM0SVX which when connected to a transceiver, can act as both
an advanced repeater system and can also operate on a simplex channel. One could
call it a radio operating system since it sits between the hardware (transceiver)
and the applications (modules) and handle basic system services as well as input
and output.
Source:https://www.svxlink.org/
6
These are my note from my experiences installing SVXLink on a Raspberry Pi 4
Model B Rev 1.2 with 4Gb RAM running Buster Raspbian GNU/Linux 10
[Top][Home]
There is a lot of information on this page. It is worth reading in order to get
a background uderstanding of how the svxlink package operated.
https://github.com/sm0svx/svxlink/wiki/InstallationInstructions
[Top][Home]
svxlink/EchoLink requires that your router or firewall allow inbound and outbound
UDP to ports 5198 and 5199, and outbound TCP to port 5200. If you are using a
home-network router, you will also need to configure the router to "forward" UDP
ports 5198 and 5199 to the PC on which EchoLink is running.
Update the port fowarding in the access modem to point these ports to the
IP address of the device running the svxlink server.
AUDIO_CHANNEL
Specify the audio channel to use. SvxLink can use the left/right stereo channels as two mono channels. Legal values are 0 or 1
The " " command should show 5200, 5298, 5199 ports as open.
The nmap command should show the ports as open.
ou will not see the internal IP but the selected device will be servicing
the ports if they are open.
[Top][Home]
At date of writing the is the Debian Package, svxlink-server (17.12.2-4) and on the
RPi Buster we will be installing for the arm64 architeture.:
[Top][Home]
English Language Pack for SvxLink Server
This is an english language pack for SvxLink Server created using the Heather
voice from the Acapela Box service.
NOTE CAREFULLY These are raw files which cannot be used directly with
svxLink Server. They must first be processed using the filter_sounds.sh script
to get the correct format.
Also, note that this is a commercial service and ever syllable has to be
paid for. The prefered option is to download processed sound files from the
releases page.Check here for the latest release:
https://github.com/sm0svx/svxlink-sounds-en_US-heather/releases
Download the pre processed sound bites. Always check for the latest release.
At time of writing this is 19.09:
https://github.com/sm0svx/svxlink-sounds-en_US-heather/releases/tag/19.09.99.1
[Top][Home]
Edit AUDIO_CHANNEL in both [Rx1] and [Tx1] stanza in svxlink.conf.
AUDIO_CHANNEL Specify the audio channel to use. SvxLink can use the left/right
stereo channels as two mono channels. Legal values are 0 or 1. Which channel is
used for TX and which is used for X depends on how the cable is wired to the
sound card jack. See Interface Cable Construction for how
I have elected to wire the cable. The config settings must reflect the
physical cable wiring.
[Top][Home]
SQL_DET in [Rx1] Specifies the type of squelch detector to use. Possible values
are: VOX, CTCSS, SERIAL, EVDEV, SIGLEV, PTY, GPIO or HIDRAW. I will use VOX.
PTT_PORT in [Tx1]
[Top][Home]
In svxlink.conf in the [SimplexLogic] stanza set RX=NONE
Only use this to test sounds as it directs audio out to computer default audio
out device and not the device the radio is connected to.
Start svxlink manually and issue the "*#" command:
[Top][Home]
Radio-Transceivers/Tait-Radios/Tait-Radios.html#T2000-UIS
This is a way of testing that svxlink is operating and able to access the sound files:
svxlink.conf should look like this::
[Top][Home]
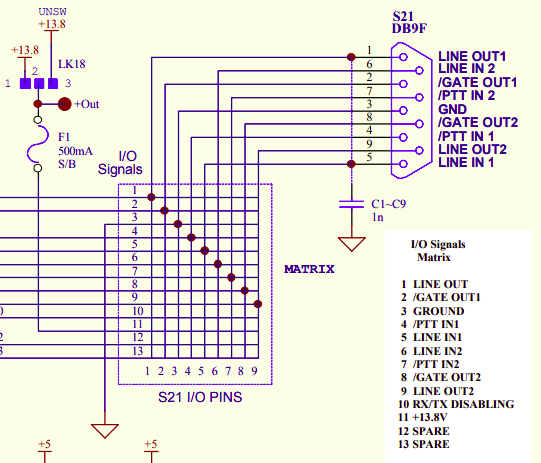
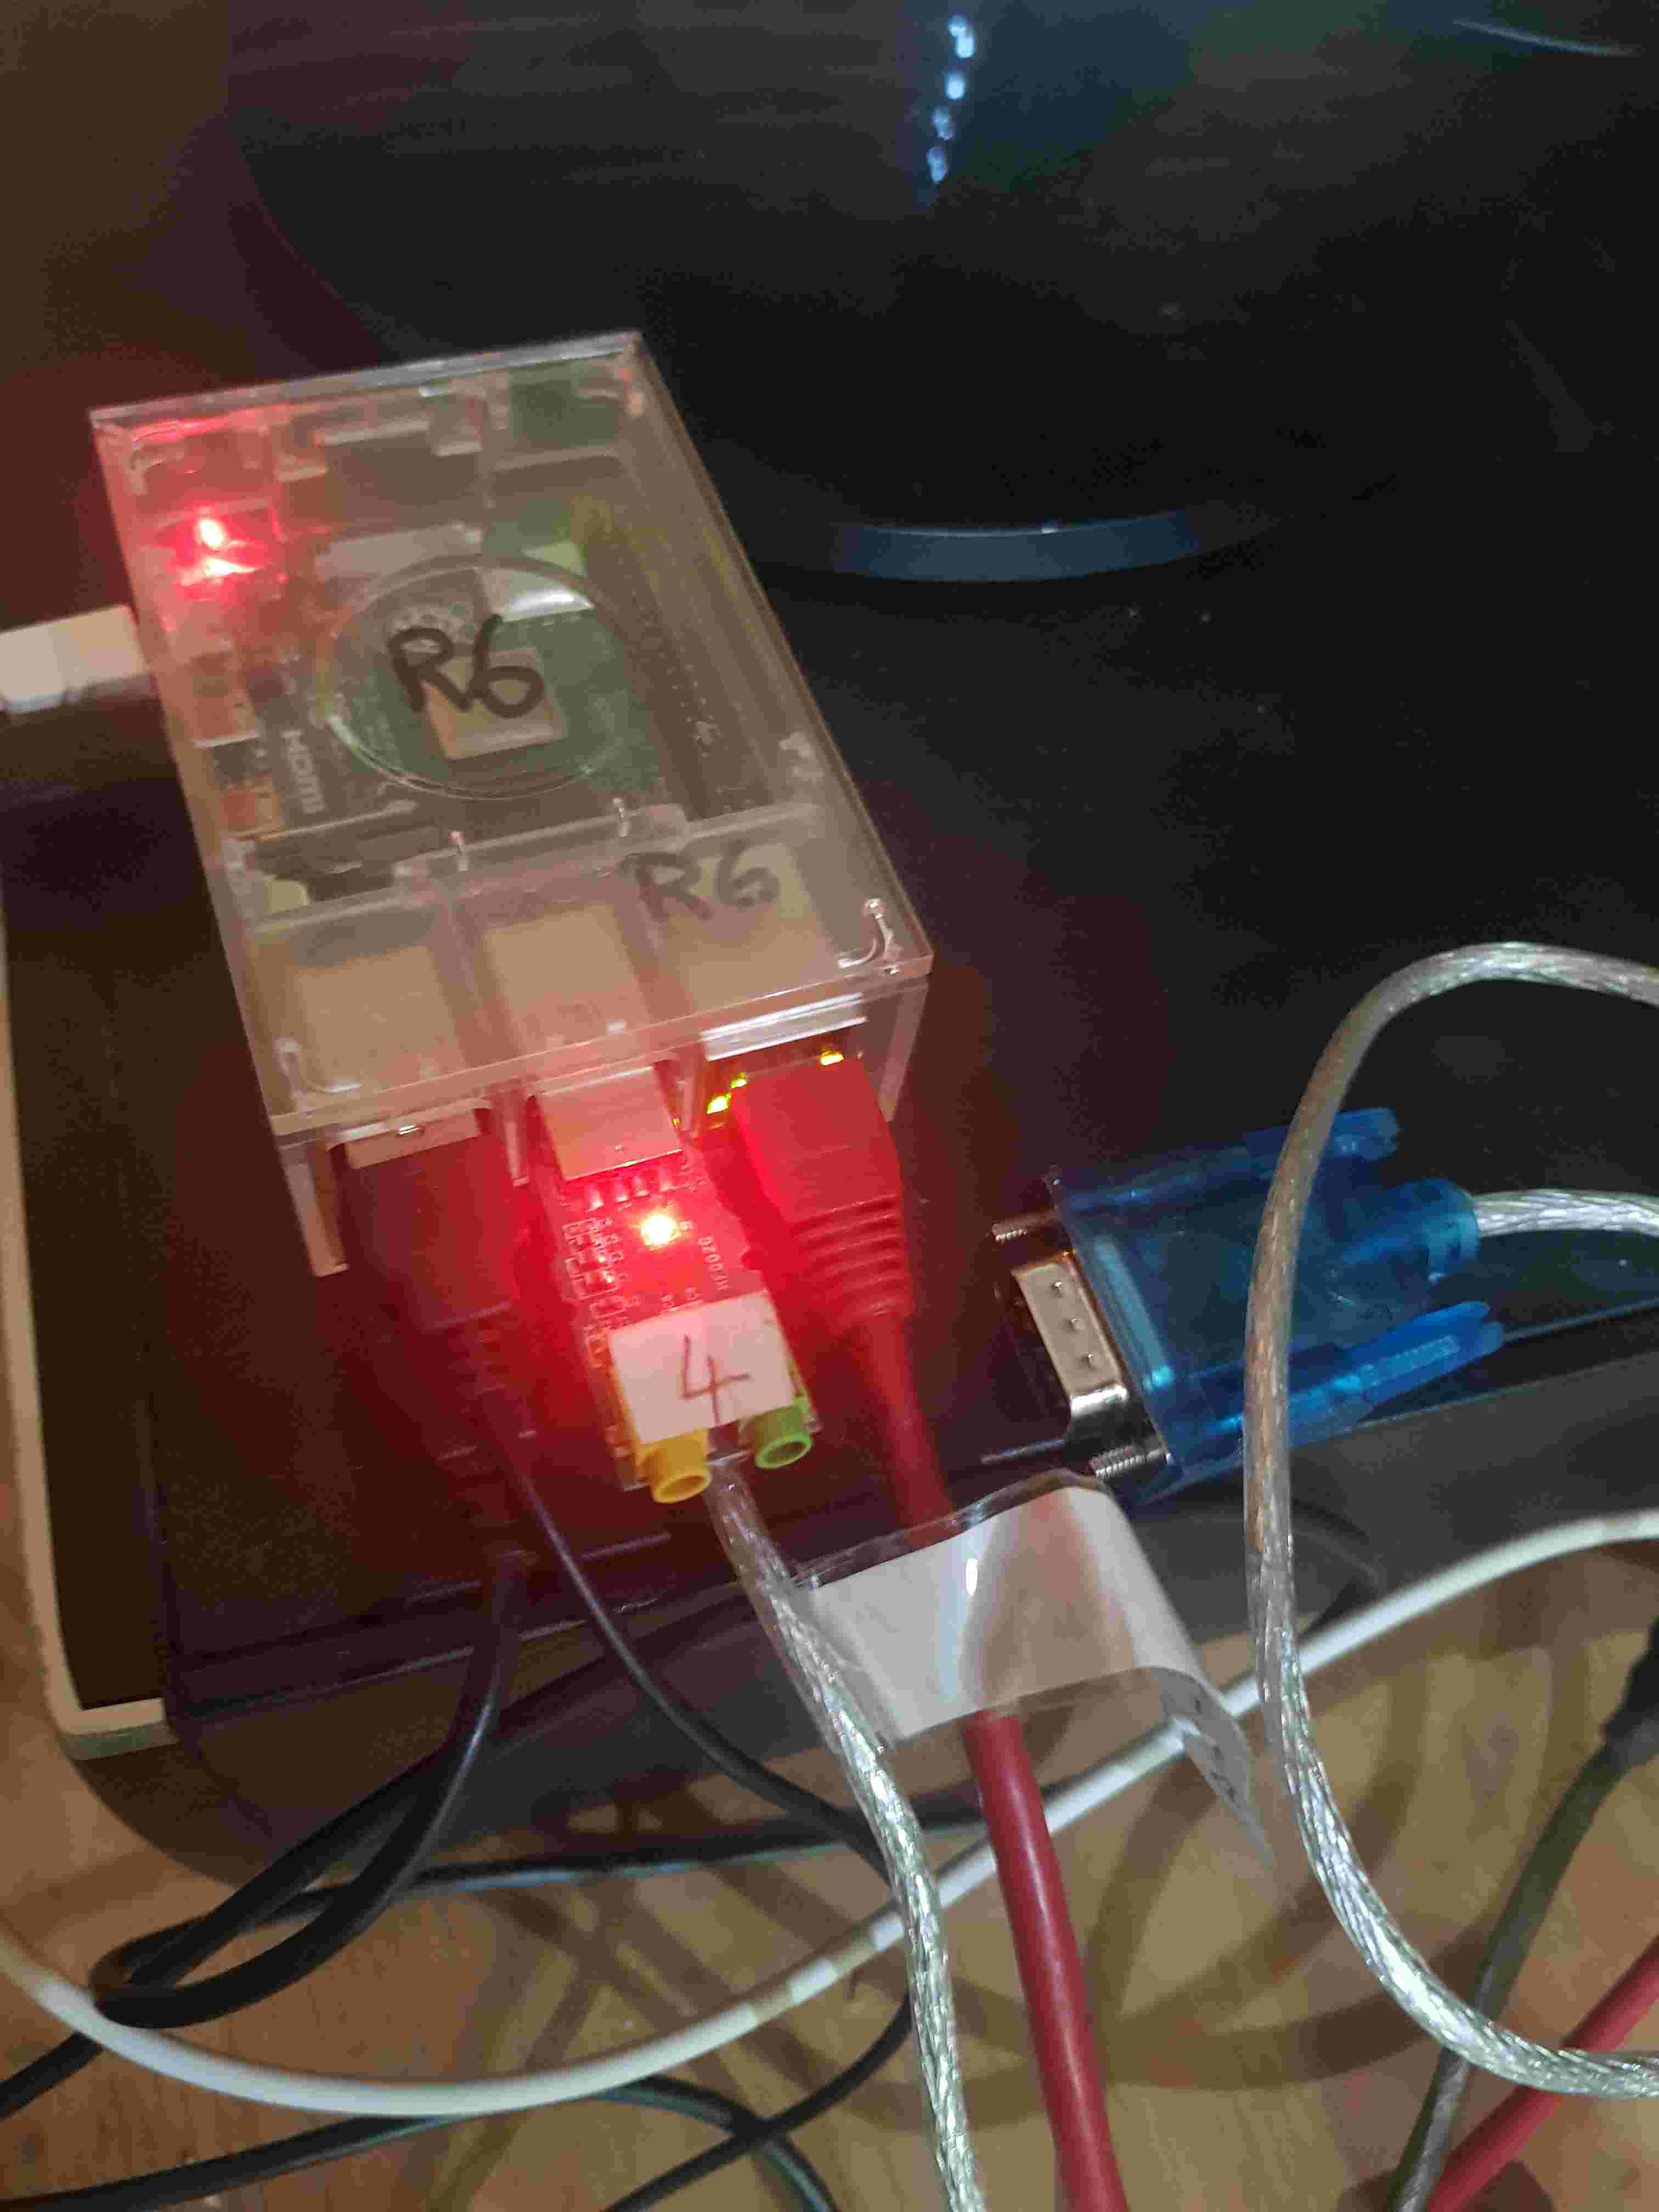
A Tait T2015 with a T2000-UIS interface card was available for use. See the Tait radio page here,
Tait-Line-Interface-Kits for more details on this model Tait radio
Link Setting:
| Link | Set To | Function | Options |
|---|---|---|---|
| LK1 | 2-3 | LINE OUT Flat / De-emphasised | 1-2 Flat / 2-3 De-emphasised |
| LK2 | IN | MIC AUDIO to LINE OUT | IN = YES / OUT = NO |
| LK3 | OUT | BEEP to LINE OUT | IN = YES / OUT = NO |
| LK4 | OUT | LINE IN to LINE OUT Side Tone | IN = YES / OUT = NO |
| LK5 | 1-2 | GATE OUT Source | 1-2 BUSY + RX GATE 2-3 BUSY ONLY 2-4 TRUNKED BUSY |
| LK6 | 2-3 | LINE IN Flat / Pre- emphasised | 1-2 Flat / 2-3 Pre-emphasised |
| LK7 | IN | LINE IN to Volume & Speaker | IN = YES / OUT = NO |
| LK8 | IN | LINE IN Flat / Pre- emphasised | IN= Pre-emphasised / OUT = Flat |
| LK9 | IN | LINE IN 1 600 Terminated | IN = YES / OUT = NO |
| LK10 | IN | LINE IN 2 600 Terminated | IN = YES / OUT = NO |
| LK11 | OUT OUT | LINE OUT, LINE IN, GATE OUT and PTT IN Control | OUT = NONE 1-2 AUX SW 2-3 CALL SW |
| LK12 | OUT | RX/TX Disabling | IN = YES / OUT = NO |
| LK13 | OUT | RX Disable | IN = TX ONLY/ OUT = NO |
| LK14 | OUT | GATE OUT Phase | OUT = Active Lo / IN = Active Hi |
| LK15 | OUT | PTT IN Phase | OUT = Active Lo / IN = Active Hi |
| LK16 | 2-3 | GATE OUT Relay Phase | 1-2 N.C. / 2-3 N.O. |
| LK17 | OUT | GATE OUT Common to Ground | IN = GROUNDED / OUT = NOT |
| LK18 | 1-2 | I/O Signals matrix line 11 - Volts Source | 1-2 +13.8V SW / 2-3 +13.8V UNSW or OUT = NONE |
| LK19 | IN | OPTO Coupler Option | IN = Yes / OUT = NO |
| LK20 | 20 | TX Tail Timer | IN = Yes / OUT = NO |
| LK21 | 2-3 | External Line Source | 1-2 /Emrgncy / 2-3 RX/TX Disabling |
| LK22 | ** Not Found | LINE OUT 1 output impedance | IN = Very Low / OUT = 600 OHMS |
| DB9-F Pin No (Radio Interface) | Colour | Function Set in Config | To DB9-M Pin No (Serial Port/UART) |
|---|---|---|---|
| 1 | Blue | DCD | |
| 2 | No Connection | TX | |
| 3 | No Connection | TX | |
| 4 | Yellow | DTR | |
| 5 | Red | Signal GND | |
| 6 | No Connection | DSR | |
| 7 | Green | RTS | |
| 8 | No Connection | CTS | |
| 9 | No Connection | RI |

| DB9 | Colour | Connected to | UART Signal | Description | I/O | Tait Terminology |
|---|---|---|---|---|---|---|
| Pin 1 | White | Audio Out Cable 3.5mm Jack | Discriminator Audio Out from Radio To mic input on sound card | Out | LINE OUT 1 | |
| Pin 2 | Blue | Serial UART | DCD | Radio Busy Indicator | Out | /GATE OUT 1 |
| Pin 3 | No Connection | Ground | - | GROUND | ||
| Pin 4 | Yellow | Serial UART | DTR | PTT | In | /PTT IN 1 |
| Pin 5 | Red | Audio Cable | Transmit Audio | In | LINE IN 1 | |
| Pin 6 | Bare Wire | Audio In Cable 3.5mm Jack | Audio In Ground | LINE IN 2 | ||
| Pin 7 | Green | Serial UART | RTS | No Connect | /PTT IN 2 | |
| Pin 8 | White | Serial UART | Signal GND | Data Mute | In | /GATE OUT 2 |
| Pin 9 | Bare Wire | Mic Cable | Mic Ground | Audio Out Ground | Out | LINE OUT 2 |
Note that the sounds cards are, at mininium, two channel or stereophonic devices and the Radios are
single channel or monaural devices, so only one channel is used+. Which channel is
used is determined by the wiring and the setting in configuration in the svxlink.conf
configuration file unde the relevant [Rx] stanza. The left stereo channel is Channel
The is can be tested with the speaker-test utility.

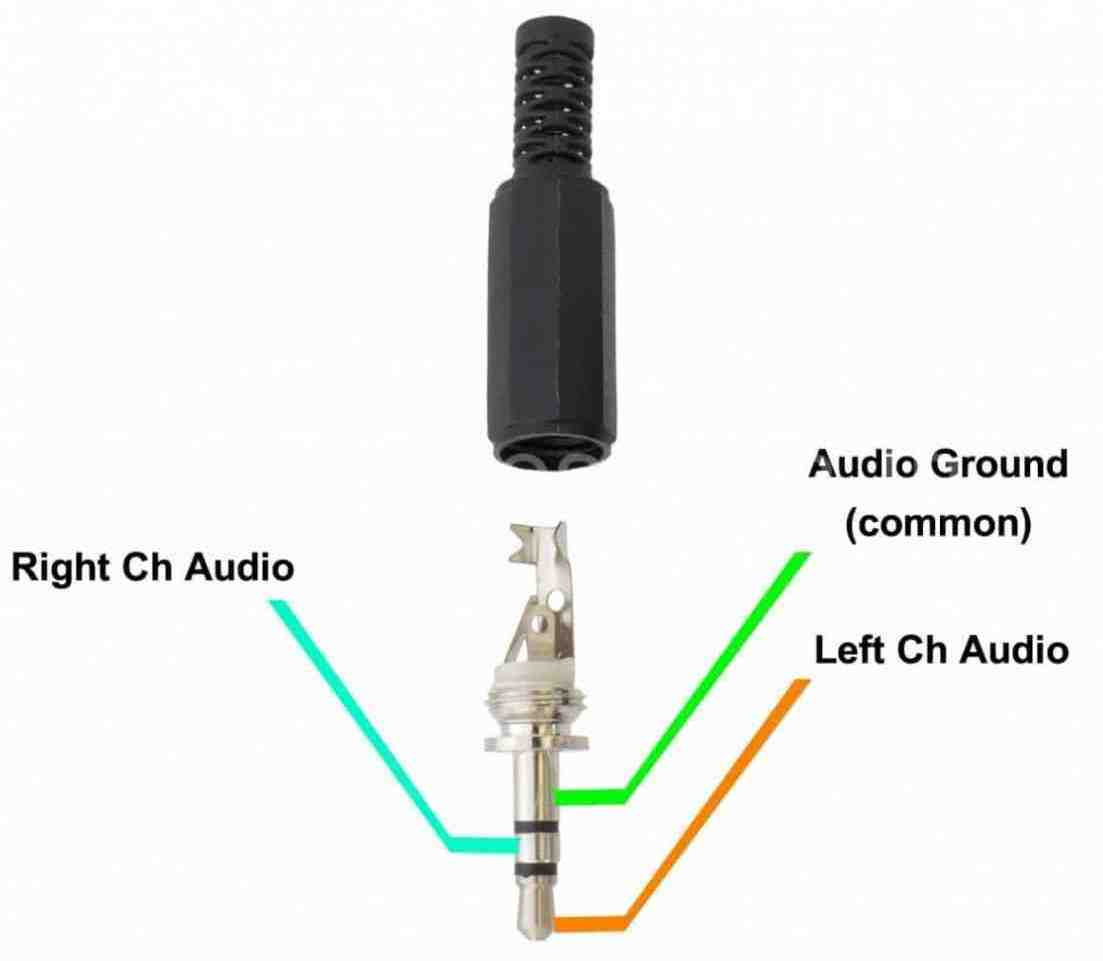
Audio OUT from Radio on 3.5mm TRS Style Stereo Jack Audio Connections
Plugs into Microphone on sound card:
| Jack | Audio Signal | Name | Colour | Pin on Radio's DB9 |
|---|---|---|---|---|
| Tip | Left Channel | Channel 0 | White | 5 |
| Ring | Right Channel | Channel 1 | Red | No Connect |
| Sleeve | Audio Ground | Common | Bare Wire | 6 |
| Jack | Audio Signal | Name | Colour | Pin on Radio's DB9 |
|---|---|---|---|---|
| Tip | Left Channel | Channel 0 | White | 1 |
| Ring | Right Channel | Channel 1 | Red | No Connect |
| Sleeve | Audio Ground | Common | Bare Wire | 9 |